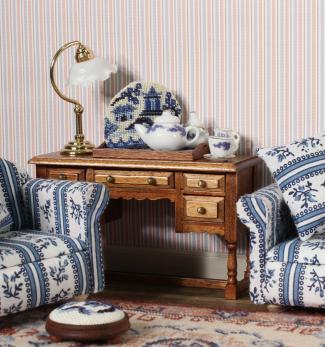
What stitches are used to do dollhouse needlepoint?
ONLINE MINIATURE NEEDLEPOINT EMBROIDERY TUTORIALS
‘Needlepoint’ is a simple embroidery technique which is sometimes called ‘tapestry’ or ‘petit point’ – even if it gets called by different names, the stitches used are the same! There are only two main stitches to learn, and they are very easy to do. Needlepoint can be worked on any fabric with an even number of warp and weft threads, such as canvas or evenweave, as it is a stitching technique which is counted from a chart. You will find it is a relaxing thing to be stitching away, covering the fabric with simple stitches in a rhythmic movement of the hand. Needlepoint differs from cross stitch in the stitches used, but it is quickly picked up by beginners. If you can already do cross stitch, you can definitely do needlepoint – and it’s quicker, too!
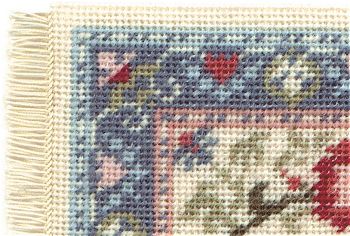
Needlepoint uses two stitches – tent stitch and basketweave stitch. From the front of your work, both stitches look similar to half cross stitch (that is, the stitch is a slanting one that goes diagonally across an intersection of the base fabric or canvas), but the difference lies in the way the stitch is made, and the resulting way that the thread is taken across the back of your work. It is worth learning to do these two stitches properly, as they are simple to do, and make a lot of difference to the quality of your work, whether for miniature or ‘full-size’ needlepoint. Tent stitch is used for the detail in the design, and basketweave stitch for the larger areas of colour and background.

HOW DO I WORK TENT AND BASKETWEAVE STITCH?
Both types of stitch are worked using a ‘stabbing’ rather than a ‘sewing’ motion. That is, the stitch is done in two separate stages, rather than a single ‘scooping’ movement of the needle through the fabric. Whichever type of stitch you use, make sure that all stitches over the whole design lie in the same direction. See Diagrams 1 and 2 for how each stitch is made, and also the photos beneath the diagrams. The numbers on the stitch diagrams signify ‘bring the needle up at 1, down at 2, up at 3’, and so on.
This photo shows an ‘Eleanor’ carpet being stitched. The turquoise detail has already been worked in tent stitch, and the pale peach background of the border is being worked in basketweave stitch.

Tent stitch is worked in either horizontal or vertical rows across the fabric, making short slanting stitches across one intersection of fabric thread on the front, and long slanting stitches on the back. The stitch is used for the detailed design areas. To only use this stitch for the whole piece of work would cause significant distortion to your fabric, as the continual sideways pulling of the diagonal stitches on the back would make the fabric twist out of shape.
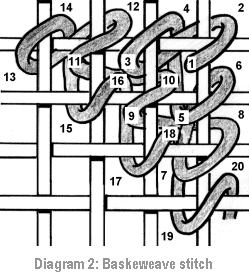
Basketweave stitch is worked in diagonal rows across the fabric, making similar short slanting stitches on the front, but the vertical and horizontal stitches on the back look ‘interwoven’, hence the name. Both types of stitch look the same from the front when completed, but using basketweave for the larger areas of colour will virtually eliminate distortion of the fabric (especially if you use a frame as well). You will need to take care when starting new lengths of thread: try to end ‘mid-row’ so that it is easy to tell in which direction you were travelling. If you do two ‘down’ rows instead of one `down’ and one ‘up’, you will end up with a slight diagonal ridge which may be noticeable on the finished stitching, especially over large, pale areas of one colour.
To make sure you are working each type of stitch correctly, compare your stitches with these photos. For comparison, half cross stitch has also been included, but only to show you which stitch NOT to use for miniature needlepoint, as thread coverage is too sparse when using this stitch for a needlepoint design!

Notice how much you can see through the gaps between stitches, and see exposed white threads of the underlying canvas, when half cross stitch is used. The tent stitch covers the canvas better and tends to fill the holes better.
WHAT IS THE ‘WASTE KNOT’ METHOD, AND HOW DO I USE IT WHEN STARTING A NEW LENGTH OF THREAD?
To illustrate this method of starting each new thread length, I have used a ‘Sophie’ miniature cushion design. The canvas has been marked lightly at the edges to show the half-way points along each side. As on all my instruction sheets for all the kits I design, I recommend that you begin stitching in the centre.
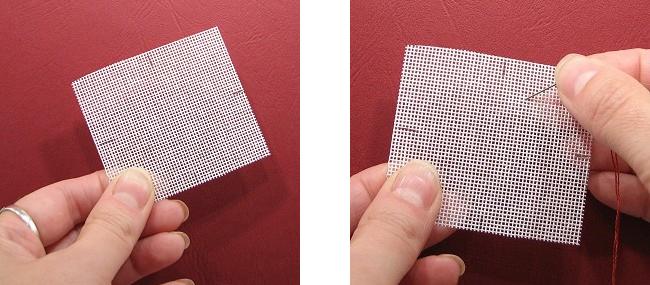
Using the waste knot method means that the back of your work will be neat and flat. When starting each new length, knot your thread but take the needle from the front to the back, about an inch away from where you intend to start stitching. As the aim is to stitch back to the area of the canvas where the knot is with the first few stitches, you need to take the thread through from the top right, in this case.
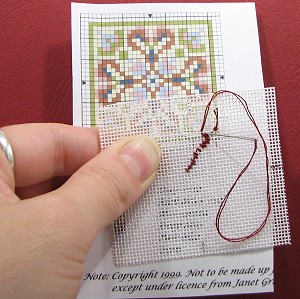
Work towards the knot, following the pattern on the colour block chart, securing the underlying thread with your stitches as you go, snipping the knot off when you reach it. You do not have to catch in the starting thread with every stitch, but just enough to hold the starting thread securely.

HOW DO I END EACH LENGTH OF THREAD?
Try not to stitch right to the very end of available thread each time – if you can barely turn the needle to insert it back into the fabric, you are being too thrifty! The last four inches (10cm) or so will be worn by then, and should not be used to stitch with. Finish off the length of thread by running the needle through a few stitches on the back of the fabric.
This photo shows clearly the whole stitching process, as seen from the back of the canvas – the starting thread going from top left to bottom right is held in place by the first few stitches which work back from bottom right to top left, then the design curves round to the right, and the length of thread is finished off by running the needle through a few of the stitches just worked. If you cultivate these methods of starting and finishing, your stitching will always be neat and flat!
Now that you have seen how easy it is to do needlepoint embroidery, why not have a look in our Needlepoint Kit Store at the nearly 300 kits and charts that I have designed especially for you to make for your doll’s house?
 |
 |
 |

