How to make a dollshouse needlepoint sampler
A Twelfth scale sampler is lovely small project to make for your doll’s house.

They only take a few evenings to complete, and can be put in virtually any room in your doll’s house. Several of the kits we offer give the opportunity to personalise the sampler with initials, names, and/or the date, so they make great presents for someone special in your life.
The miniature samplers are to be stitched in tent stitch (similar to half cross stitch) on 28 count or 32 count evenweave fabric (see each sampler’s description for details of the fabric count for that particular kit). Stitching them on evenweave fabric rather than silk gauze means that they are quite quick to do, as you only need to stitch the design detail – the background fabric is left showing, as it is already coloured.
The kits contain a fully finished wooden frame in a medium oak colour varnish along with the stitching kit, so, once the stitching is finished, you don’t have to hunt around for a suitable frame to put it in.

Begin stitching
To start with, identify the thread colours using the colour key. Using tent stitch as indicated on the diagram, start the design in the centre. Remember that one square on the chart equals one stitch, and always use a ‘stabbing’ motion, not a ‘sewing’ one. See the NEEDLEPOINT STITCHES and COUNTING FROM A COLOUR BLOCK CHARTtutorials, if you are new to miniature needlepoint.
As evenweave fabric is more robust than silk gauze of the same count, I don’t usually use a frame of any kind when stitching small projects such as this on it. However, if you prefer to use one anyway, then make up a card mount of 3″ x 3 ½ “, with an aperture of 2″ x 2 ½ ” – refer to the instructions given in the How to mount silk gauze tutorial.
Using one strand of thread in the needle, begin each length by knotting one end and taking the needle from the front to the back of the evenweave fabric, about half an inch away from where you intend to start stitching. Stitch towards the knot, securing the underlying thread as you go. Snip the knot off when you reach it. Finish each length by running the needle under a few threads on the back. When the stitching is complete, press it face down over a soft pad such as a towel, using an iron on medium setting, pulling the fabric gently if necessary to get it dead square.
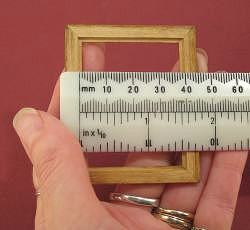
Mount the stitching in the frame
To mount the fabric in the picture frame, first make a backing card from any suitable piece of thin cardboard or stiff paper. Measure the aperture of the frame in both directions, and cut the cardboard a tiny bit smaller than this – just one millimetre will do – so that it will sit in the aperture and rest on the rebate without touching the sides, but not so small that it would fall straight through. From side to side, this aperture measures 4 cm exactly, so I would cut the card 3.9cm wide.
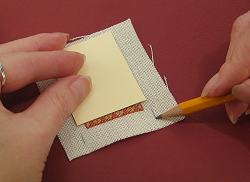
Place the stitching face up on a flat surface, and, using the backing card as a guide, lightly mark the cutting lines with a pencil, one fabric thread wider than the card. Make sure that the fabric is centred underneath the card as you do this.
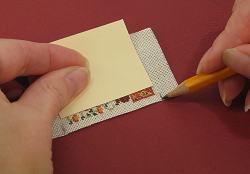
I find it easier to mark the vertical lines first, and trim them to the correct width, before marking the horizontal ones,
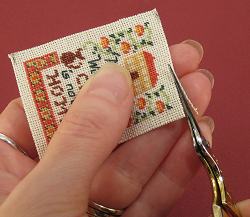
– and then cutting those.
Check the fit of the fabric in the frame each time you adjust the size, using the card backing as well, for a precise fit. If the fabric buckles at all, then it is still too large – in that case, carefully trim off one fabric thread at a time, until the fabric fits perfectly.
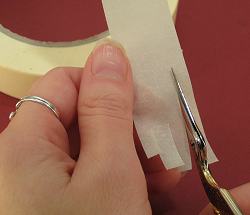
To hold the stitching in the frame, take a length of masking tape, and cut it lengthwise into narrow strips – about ¼ inch or 6mm wide is about right.
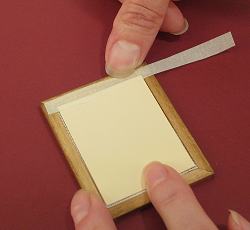
Put the stitching in the frame (right side out!). Then add the backing card and carefully tape each side with the masking tape, running your thumbnail along it to make a good join.
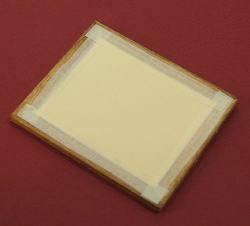
Trim any excess tape at the corners, so that none shows from the front.
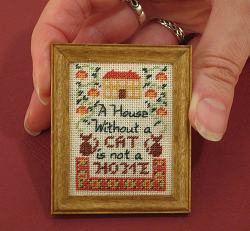
The finished sampler can be attached to the wall using Blu Tac, GripWax, or similar.
Go to the Needlepoint Kit Store now to choose from our range of doll’s house sampler designs in stock.

