How to complete a dollhouse needlepoint clutch bag
ONLINE MINIATURE NEEDLEPOINT EMBROIDERY TUTORIALS

Customers have been asking me to design some of these for years! They are surprisingly quick to make, and add that ‘personal touch’ to your doll’s house or room setting.
These Janet Granger miniature clutch bag kits contain a piece of 32 count or 40 count silk gauze (depending on the design), Anchor stranded cotton (use one strand), clear instructions, a colour block chart to count the design from, and suitable needles.
This tutorial features the ‘Peony’clutch bag design in the step-by-step photos. This is one of the range of clutch bags that we offer.
See our Needlepoint Kit Store for details.

These Janet Granger handbag kits are to be worked on 32 or 40 count silk gauze, using tent stitch for the detail, and basketweave stitch for the background (similar to half cross stitch). See the NEEDLEPOINT STITCHES Tutorial if you have not done these stitches before – they are very simple to do.
Mount the silk gauze into a card mount, as described in the SILK GAUZE Tutorial. This will make it much easier to work stitches with an even tension, and also makes your miniature stitching quicker to do!
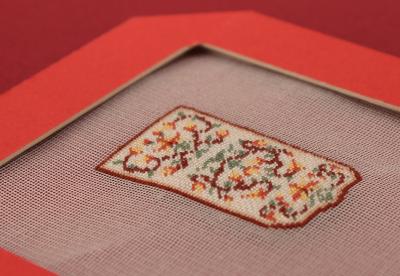
Start stitching from the centre of the design, as described in the tutorial NEEDLEPOINT STITCHES mentioned above, working outwards. When all the detail is complete, fill in the background.

When all the stitching is complete, trim the unworked gauze to a quarter of an inch all round.
Establish where the two folds on the bag will come, to define the front, back, and front flap by referring to the photo on the front of the kit. Then very carefully trim the gauze again, but only along the inner opening edge of the bag, and around the flap right up to the stitching, using sharp scissors. Trim the remaining quarter inch seam allowances by angling them slightly at the edges, to reduce bulk.
Fold back the quarter inch seam allowance of the bag sides, making sure that the fold lies right along the centre of the outermost row of stitches, so that no bare silk gauze is left showing from the front. Finger press the fold to set the crease.
Take 12 inches of one strand of leftover stranded cotton, in the same shade as the outermost row of stitches of the bag. Knot the end and make two back stitches in the seam allowance towards the bottom corner of the back of the bag.
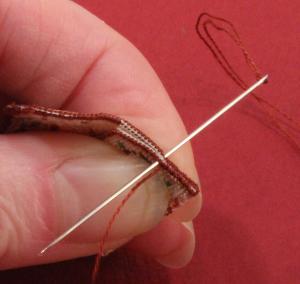
Fold the stitching so that the front and back of the bag are wrong sides together and overcast the edges, stitching into every one or two holes of the gauze. Pull each stitch quite tightly.
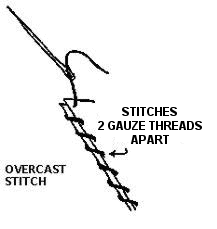
Around curved edges, ease the seam allowance into place as you stitch. End each length by making a couple of tiny backstitches in the seam area.

If you want the look of a ‘full’ bag, take some of the leftover stranded cotton (three or four feet of any colour will do), roll it into small balls, and use it to lightly stuff the bag, using a pencil to push it in.
Fold the flap over the front of the bag, and crease the top edge with your fingernail.
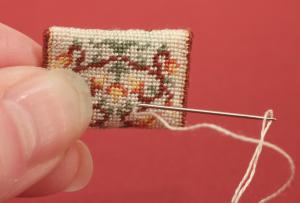
To hold the flap in place, take a length of leftover stranded cotton in the same shade as the background of the bag and make a couple of backstitches on the back of the bag: in doing this, you need to secure the length of thread by putting the needle in and pulling it out about half an inch away, pulling the strand though just enough to make the loose end disappear inside the bag. Then, restitching exactly over a couple of stitches in the same colour which have already been worked, make the two backstitches.
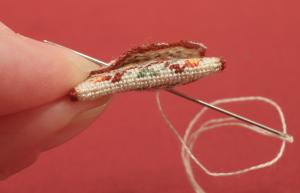
Then poke your needle from the back to the front of the bag, coming up at an angle (this helps to hold the flap down better).
Make a tiny stitch to catch the flap down, and take the needle to the back again. Do this one or two more times in different positions, making sure the stitches each time are neat and unobtrusively stitched over previous needlepoint stitches, to hold the flap in place securely.
Your doll’s house clutch bag is now finished.
