How to make a dollshouse needlepoint rectangular stool
ONLINE MINIATURE NEEDLEPOINT EMBROIDERY TUTORIALS
These tutorials were originally written to help people who had bought my dollhouse needlepoint kits – they show you how to do the stitching and assemble each type of kit. In November 2024 I retired, so these pages are now a ‘legacy archive’ only. I NO LONGER SELL THESE KITS, so please do not contact me asking where you can buy them! I plan to keep these tutorials available until at least the end of 2026, so that people who bought kits but haven’t made them up yet have a while to use the tutorials to complete their kits 🙂
These doll’s house scale rectangular stools are great little pieces of furniture!

They can be placed in many different rooms in your doll’s house, such as the drawing room, bedroom, hallway or even music room – they make brilliant piano stools!

This Janet Granger miniature needlepoint kit includes two parts: a ‘stitching’ component, which comprises a piece of 32 count silk gauze, colour block chart, detailed instructions with diagrams, a needle and Anchor stranded cotton; and also a ‘wooden stool’ component comprising unvarnished pre-cut wooden parts, a foam pad for the stool top and instructions for how to make this quality furniture kit.
This tutorial features the ‘Tree of Life’ stool design.
If you have never done miniature needlepoint before, start by reading the BASIC EQUIPMENT and NEEDLEPOINT STITCHES tutorials first, then come back to this page.

Before you begin stitching, you will need to make a card mount for the silk gauze. This will make it much easier to work on, and help to keep your stitch tension even. Cut a piece of stiff card 3¾ x 4¼ inches, with an aperture of 2¼ x 2 ¾ inches. Fix the silk gauze to the card with masking tape along all four edges, as tautly as possible.
See the HOW TO MOUNT SILK GAUZE tutorial for details.
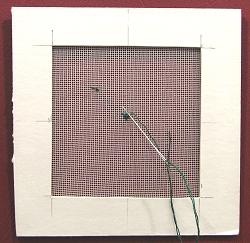 Identify the thread colours supplied in the kit using the colour key, then, using tent stitch and one strand of the Anchor stranded cotton, start the design in the centre. Remember that one square on the chart equals one stitch, and always use a ‘stabbing’ motion, not a ‘sewing’ (scooping) one.
When the stitching is complete, if it has become slightly mis-shapen (especially if you did not use a card mount to hold the silk gauze taut), press it on the reverse side with a medium hot iron with steam, on a padded ironing board, pulling the fabric gently if necessary to get it dead square.

Trim the finished stitching so that there is a margin of half an inch of unworked gauze on each side. It is NOT necessary or desirable to use a fabric glue around the edges first. With a sharp pencil, lightly mark the centre points along each of the four sides, in the unworked border, on both sides of the gauze. Mark the centre lines in pencil on the card, then carefully glue the backing card to the foam using white tacky glue (see the assembly instructions, further down this page). These lines will make it much easier to position your stitching centrally on the foam pad.

Using white tacky glue, spread a line about three eighths of an inch wide along one long edge of the card backing board (not the gauze). Leave the glue to dry off for a few moments, then place the foam pad centrally onto the back of your stitching, card side up, using the pencilled guidelines to ensure that it is lined up. Wrap the gauze around the foam pad, and press the gauze into place onto the card. Briefly turn the pad over, to make sure that the design is centrally positioned, then leave the glue to dry completely.
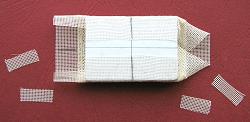
Repeat this gluing and wrapping process with the second long edge. Do not rush this stage! Next, trim the spare gauze which overhangs the short edges, cutting off a piece a quarter of an inch by the depth of the overhang. This will reduce bulk.
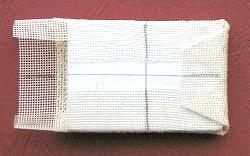 Crease the gauze ready to fold it up over the backing board, as you would when wrapping a parcel. Spread glue along one of the short edges of the card backing board. Wrap the gauze up and around the foam pad, pulling tightly just before pressing down onto the board, in order to get neat corners. Check that the design is still central on the pad. When the glue has dried, repeat for the fourth side.
 TO ASSEMBLE THE STOOL
First, identify the wooden parts, referring to the instruction sheet that comes with the kit.
Lightly sand all the wooden components.
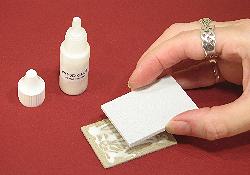
Glue the foam pad to the cardboard piece, pressing together firmly, and leave to dry completely. See the separate stitching assembly instructions for how to mount the stitching on the pad (above).
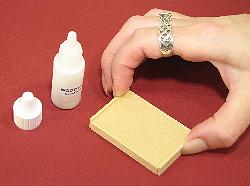
Place the large wooden base piece on a flat surface, and spread glue thinly over the ends (one at a time), then fix the short end pieces into position, holding in place for a few seconds.

Once the glue has completely dried, add the long sides in the same way. This should create a shallow rebate on the top surface of the stool for the foam pad to fit into later.
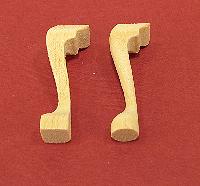
Sand the cabriole legs so that each vertical surface of the leg is smoothly rounded. The ‘foot’ of the leg should be sanded so that it is nicely curved almost round, but still with a flat surface where it will touch the floor.

Glue each leg into position on the base piece (making sure that the legs are glued onto the flat underside, not the side with the rebate to take the cushion pad).
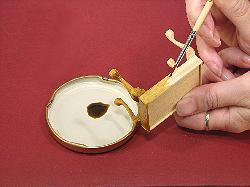
When the glue has dried, varnish the stool with two coats of coloured interior wood varnish (we used a medium oak colour for this tutorial) and a coat of clear varnish as well if you prefer. Once the stitching has been mounted on the pad, carefully glue it into position on the stool.
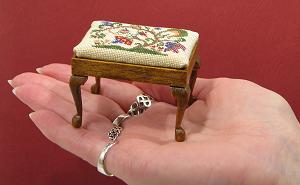
The wooden doll’s house rectangular stool kit has its own instruction sheet included, and is easily glued together and varnished if you wish.
Finally, the covered foam pad can be fitted into the wooden stool top and glued in place. Make sure that the stain or varnish that you use has completely dried before you fit the stitched seat pad into it.
